template step 1:
Either with a hole punch or a pair of scissors, make holes where the vertices of a regular pentagon would be. Precision is good, but certainly not crucial.
Start by making a paper template for your knot. I usually use scrap paper (old to-do lists, old shopping lists, calendar pages from X-a-day calendars, etc). For this knot, 1/8th of Letter sized paper (similar to A4) squared off usually does the trick. For the purposes of clarity for these instructions, I am using origami paper instead (since I can't seem to find the right size of post-it notes).
template step 1:
Either with a hole punch or a pair of scissors, make holes
where the vertices of a regular pentagon would be. Precision is
good, but certainly not crucial.
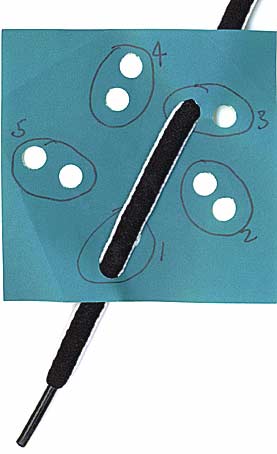
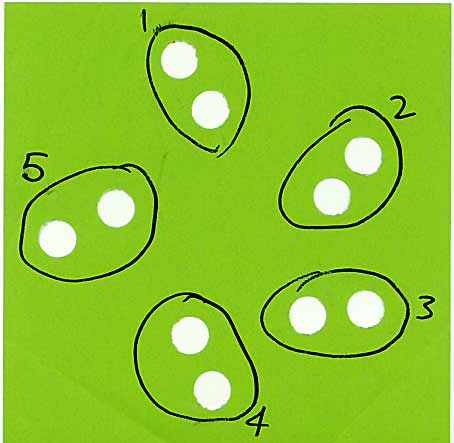
 template step 2:
Then, offset slightly, make holes where the vertices of a
smaller pentagon would be. Offset in the direction you intend to
tie the knot (counterclockwise in this case. Does handedness make
a difference to the direction you tend to tie knots? Someday a
lefty will tell me.). The smaller pentagon vertices are the inner
holes and the larger pentagon vertices are the outer holes.
There are 5 sets. If you look really closely at the paper,
you can see where I folded it to get better access to the
inside. If you're keen, you may want to round off the paper
or even cut it into a pentagon. Put however much work you
feel that you need to into the template knowing that it will
be used once and be shredded in the process.
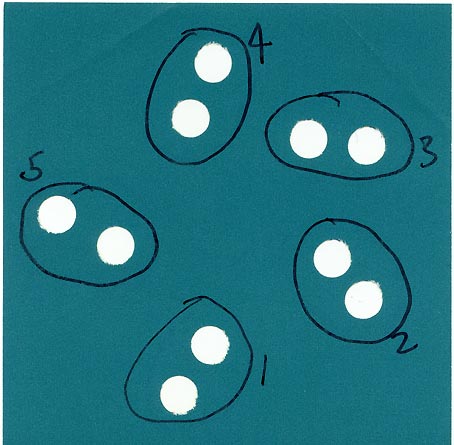
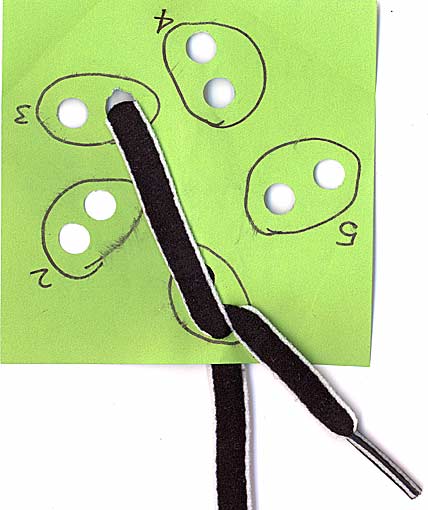
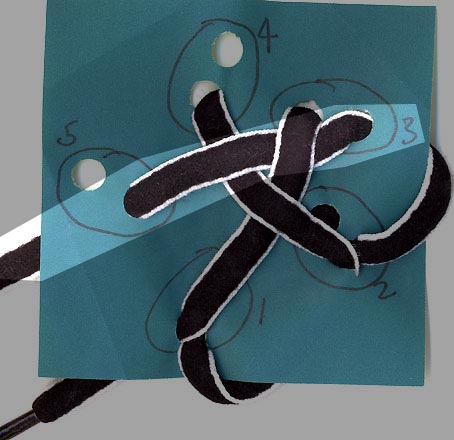
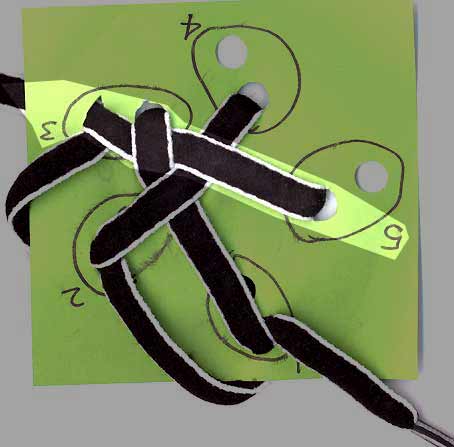
 template step 3:
If you like, label your hole sets so that there will be absolutely
no confusion as to what is going on. My sample template
conveniently happens to have a dark green front and light green
back, so it is relatively easy to tell the front from the
back.
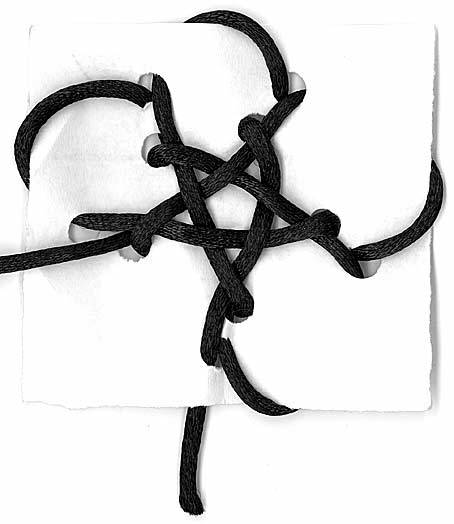

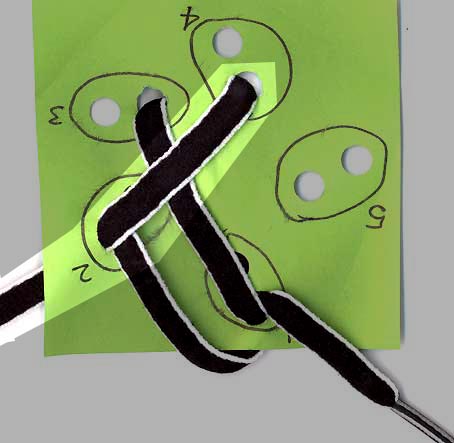
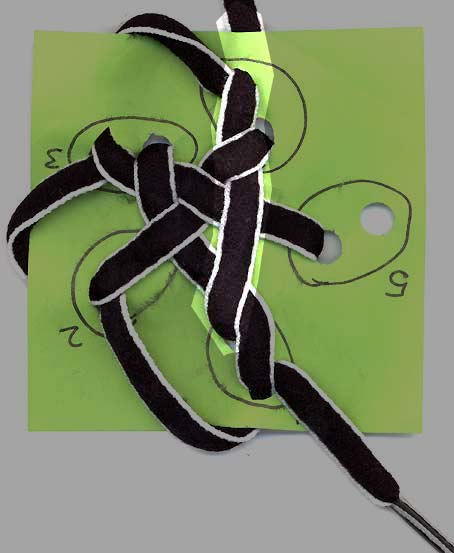
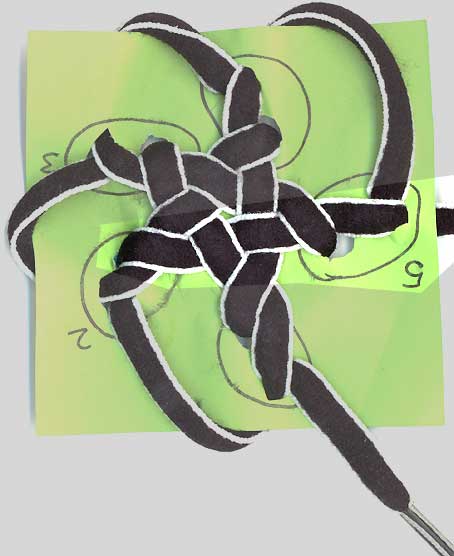
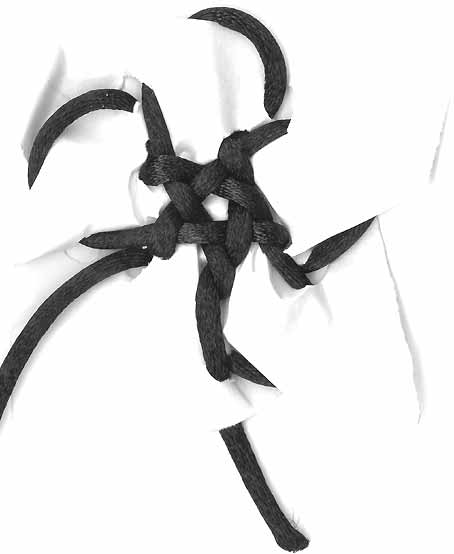
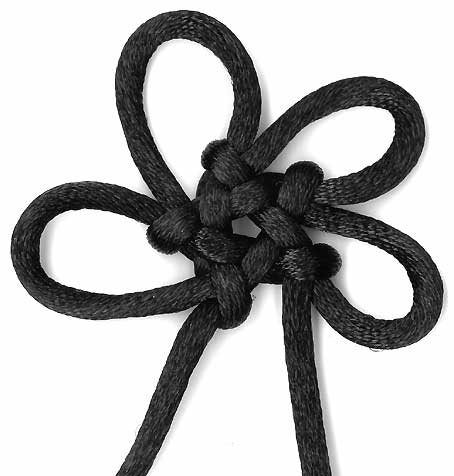
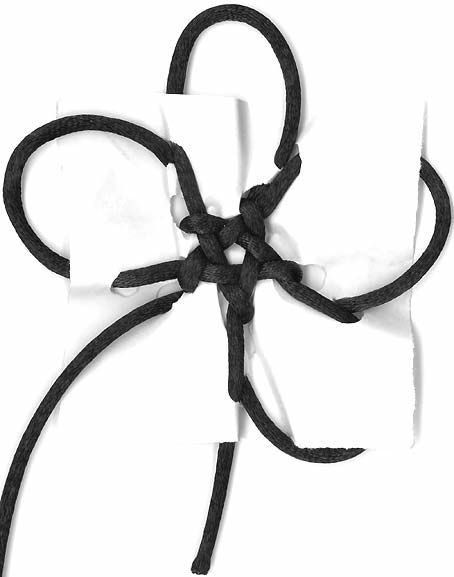 finishing:
At this point your are done basic interlacing of your knot. My
example cord just happened to fit the paper template perfectly.
That was a coincidence. Normally that doesn't happen and you need
to spend some time tightening your knot. Tighten your knot on the
template, allowing the cords to cut and crumple the paper of the
template. You can also remove excess cord from the ears while the
knot is still on the template. If you are planning to add extra
parallel cords for decoration, doing so while the knot is still on
the template makes your job easier. When the centre is nice and
tidy and close to the desired final configuration, remove the
template. Tear the paper from hole to hole and remove the paper,
being careful not to distort the knot too much while removing the
paper shreds. Tighten some more, adjust your ears and points
(adjust, fiddle, adjust), and you're done.
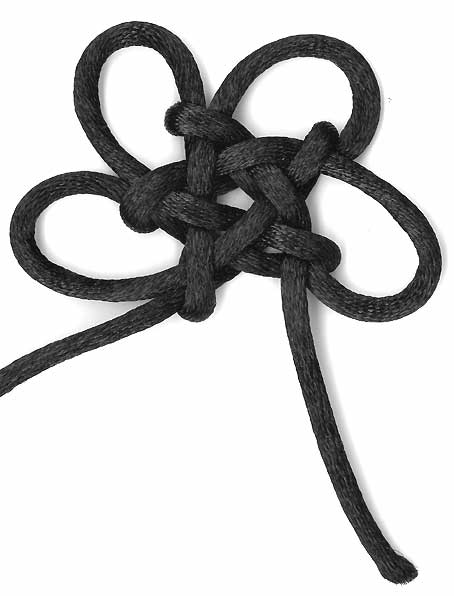
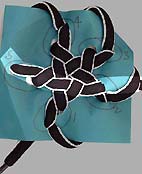
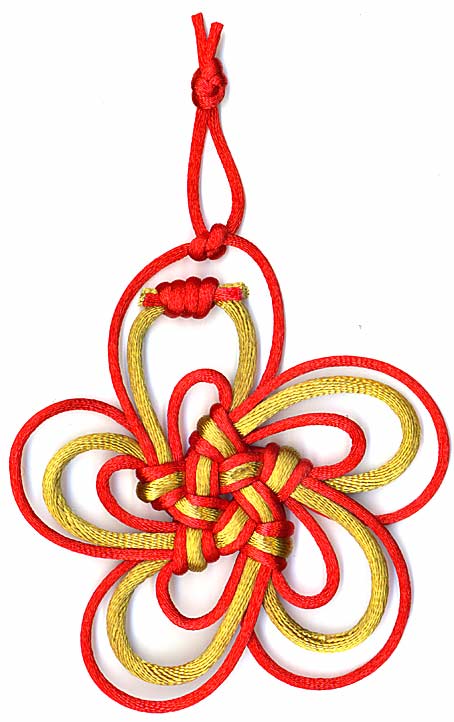
 Finished 5 Pointed Stellar Knot
Here are some Xmas ornament prototypes I made based on the 5
pointed stellar knot (stay tuned for some 6 pointed snowflake-ish
ornaments). If I hadn't been doing it at 3am on the day before I
needed them for a sample, I would have put much more effort into
finishing the ends...

Creation Date: Sun Oct 27 01:21:38 PDT 2007
Last Modified: Wednesday, 31-Oct-2007 12:07:37 UTC
Page accessed at local time: Thursday, 25-Jun-2026 13:20:38 UTC