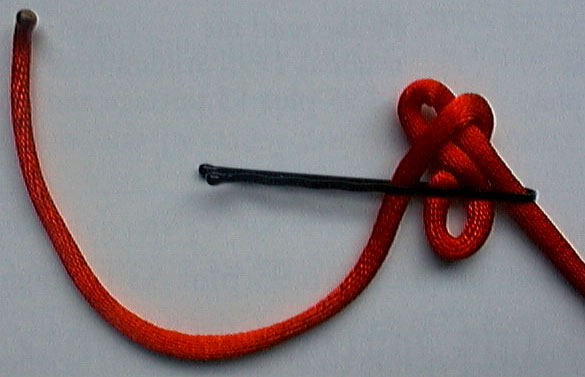
step
1:
form 2 loops as in step 1 of the 4
cloverleaf, and pin the result together with a bobby pin step
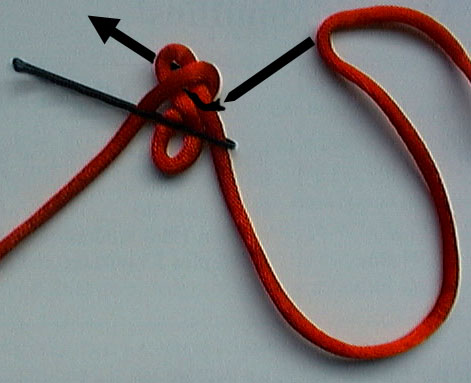
2:
form a third loop and insert it through both of the first 2 loops
step
3:
form a fourth loop and insert it through the previous 2 loops (2 &
3)
step
4:
take the free end and insert it through the previous 2 loops (3 &
4)
over the starting end (and the pin), then down through the first
petal
step
5:
take the free end under the starting end (and the pin),
then back through the same 2 loops (3 & 4) in the reverse
direction
step
6:
take the free end and insert it through loop 4
the starting end and the pin will be between loops 4 & 5, pass
over those
insert the free end through the top part of loop 5
then take the free end through the second petal
step
7:
insert the free end through the bottom part of loop 5 (you'll
might want to turn the knot over)
under the starting end and pin
then back through the 4th loop
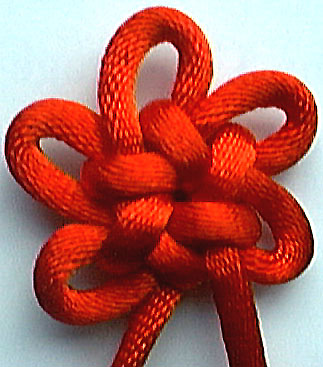
step
8:
the knot is now done except for the the tightening
it is often useful to leave the pin in place for the first stage
of tightening as it helps to provide structure and clues as to
what are centre loops and what are petals
tighten in all directions, taking up slack until the centre is
tight and there is clear distinction between centre and petals
step
8a:
taking the pin out, it is helpful to hold the centre of the knot
firmly with the fingers of one hand while tightening by pulling on
the petals and ends with the other
step
8b:
the pin can also be inserted into the very centre of the knot to
help guide the formation of symmetry as further tightening, slack
removal, and petal shaping continues
 step
2:
step
2: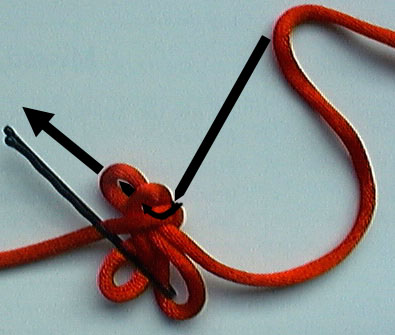 step
3:
step
3: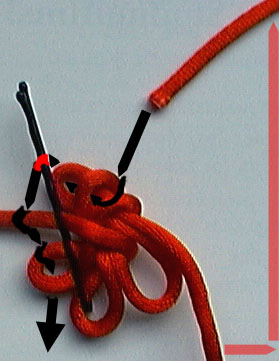 step
4:
step
4: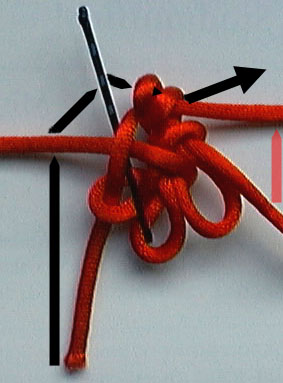 step
5:
step
5: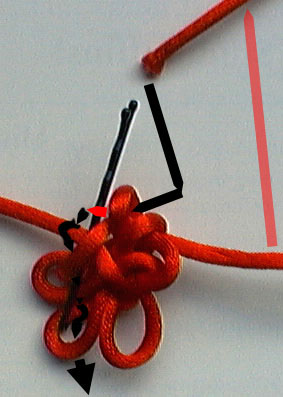 step
6:
step
6: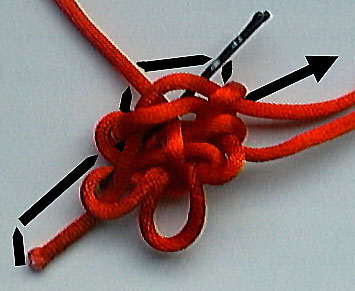 step
7:
step
7: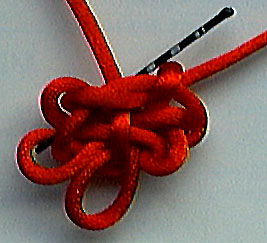 step
8:
step
8: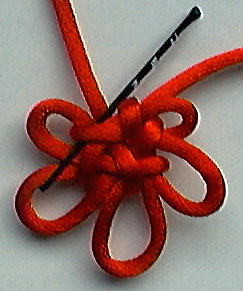 step
8a:
step
8a: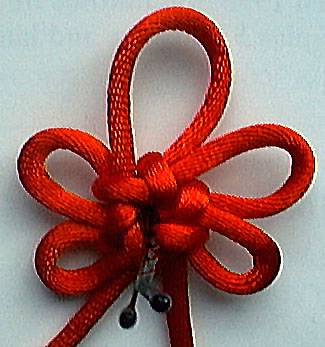 step
8b:
step
8b: