I will show you a number of ways to start. Choose the one you are most comfortable with. I will proceed with the template method which I feel to show the rest of the steps most clearly and unambiguously for those just learning. As you gain experience, you will likely use fewer and fewer tools in your knot tying, but as always it is up to you to choose what works for you.
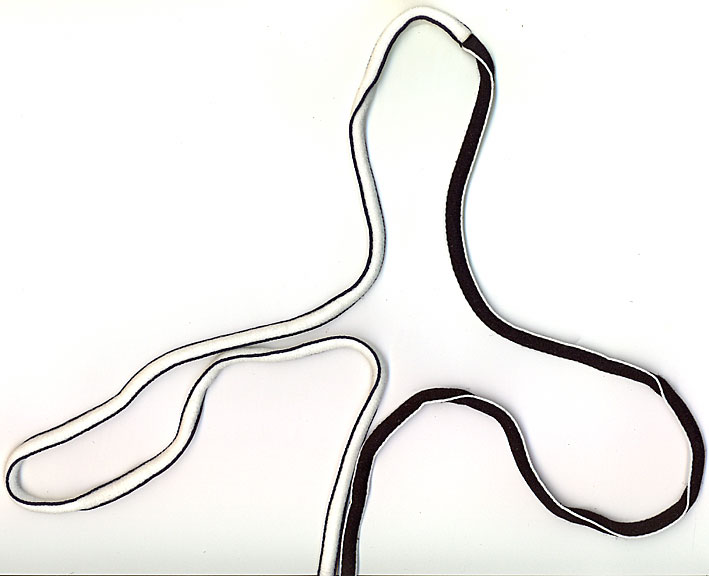
This is an unruly or freehand start for the good luck knot. I
usually use this method, however it requires a much longer working
length than the others as long loops are easier to work with and
less prone to disappearing as you tie.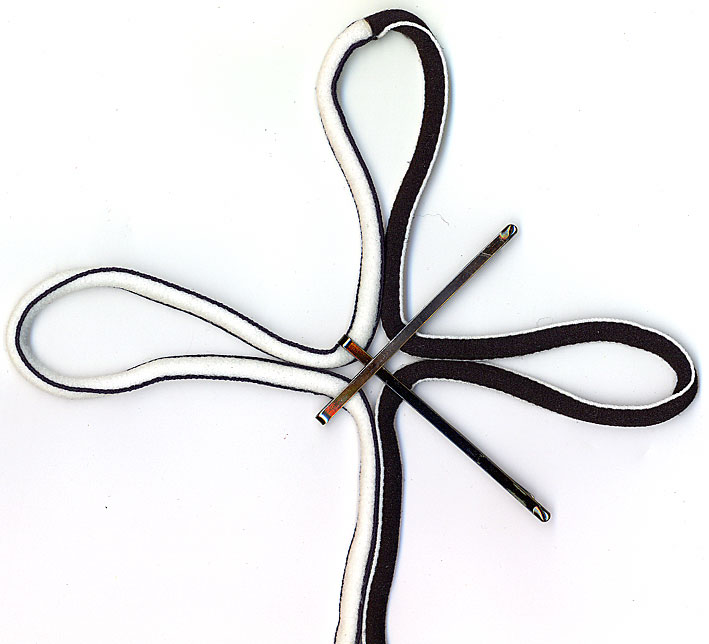 This is a pinned start for the good luck knot. In case it is not
clear from the illustration here, those are bobby pins or hair
pins. Of course, you can use a pin board and straight pins (or
thumb tacks or what have you). In that case, lay it out as above
and pin away.
This is a pinned start for the good luck knot. In case it is not
clear from the illustration here, those are bobby pins or hair
pins. Of course, you can use a pin board and straight pins (or
thumb tacks or what have you). In that case, lay it out as above
and pin away.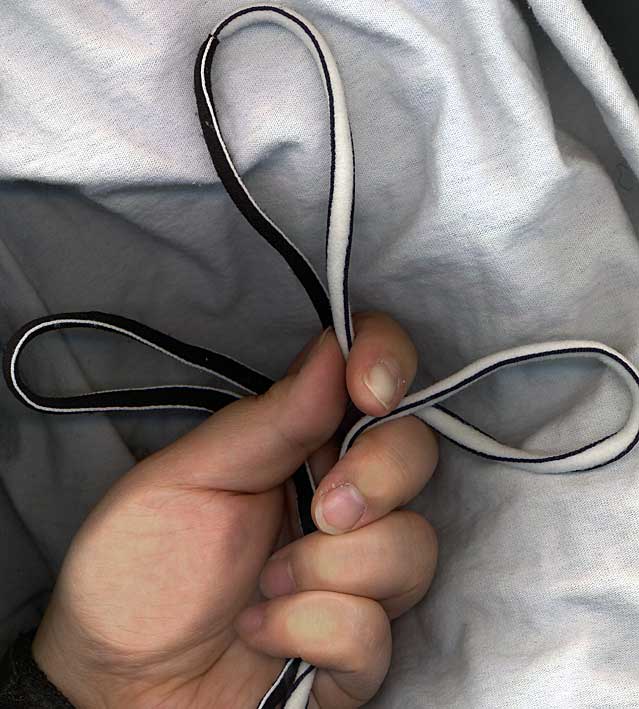 You can, of course, tie the knot in hand. Your fingers really get
in the way of seeing exactly where the string is, though, so it's
a poor choice for illustrating the instructions.
You can, of course, tie the knot in hand. Your fingers really get
in the way of seeing exactly where the string is, though, so it's
a poor choice for illustrating the instructions.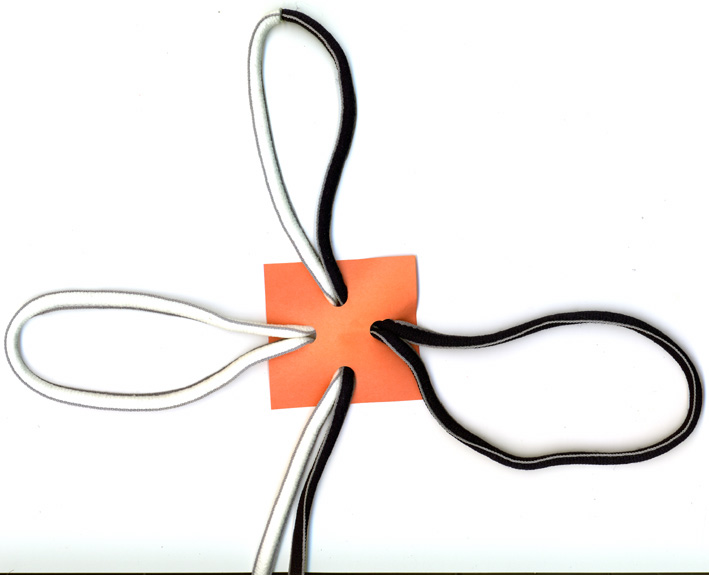

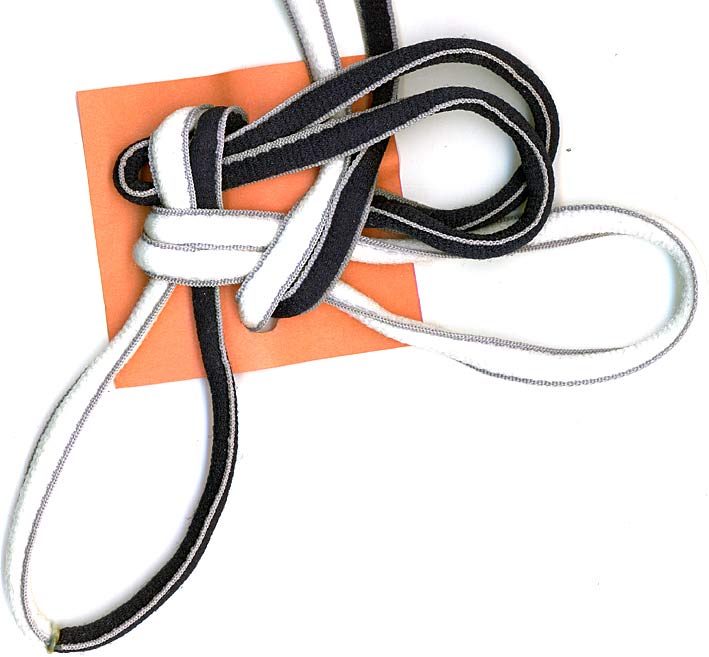
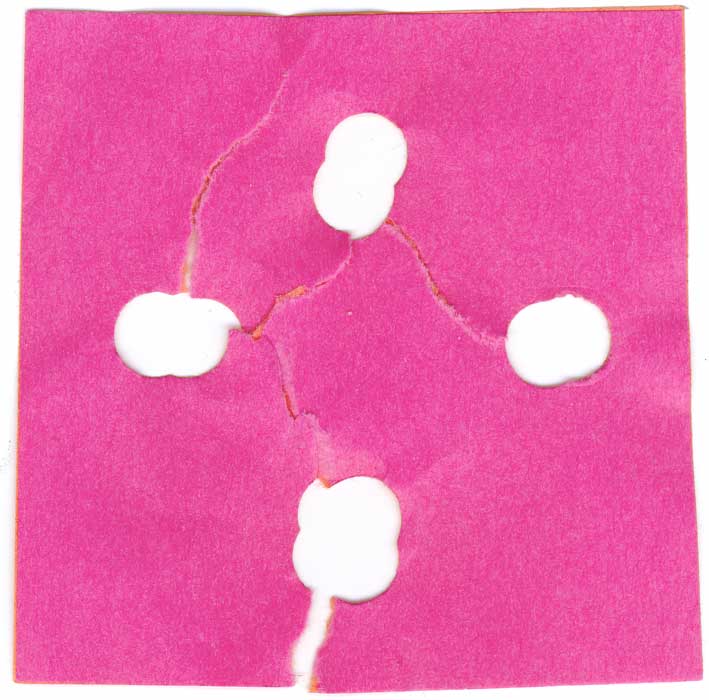 Take a paper template and punch four holes in it (see right, sorry for
forgetting to take the picture until after it was torn off the
knot...). Pull the loose ends through one of the holes, and pull
bights through each of the other holes (see far left,
orange). Pull the cord through the template until it is snug
against the back of the template (see
left, pink).
Take a paper template and punch four holes in it (see right, sorry for
forgetting to take the picture until after it was torn off the
knot...). Pull the loose ends through one of the holes, and pull
bights through each of the other holes (see far left,
orange). Pull the cord through the template until it is snug
against the back of the template (see
left, pink). step 1:
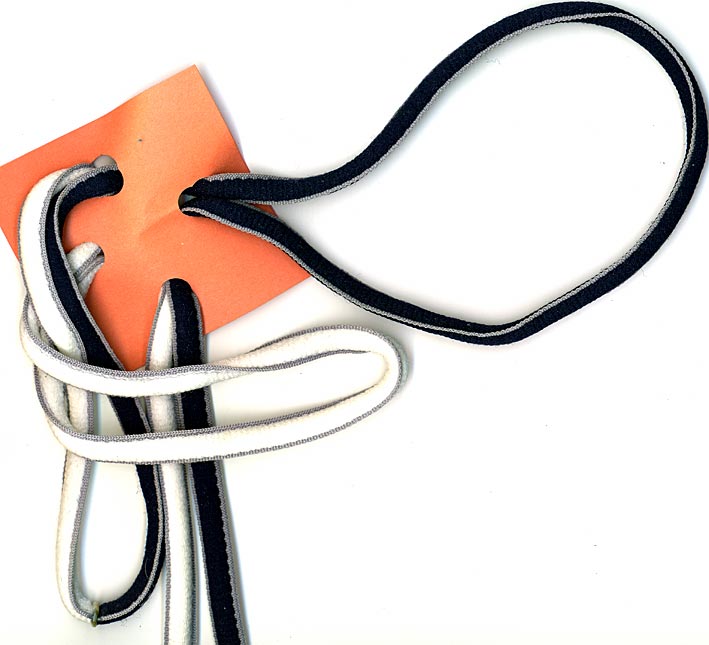 step 2:
 step 3:
 step 4:
 step 5:
 step 6:
 step 7:
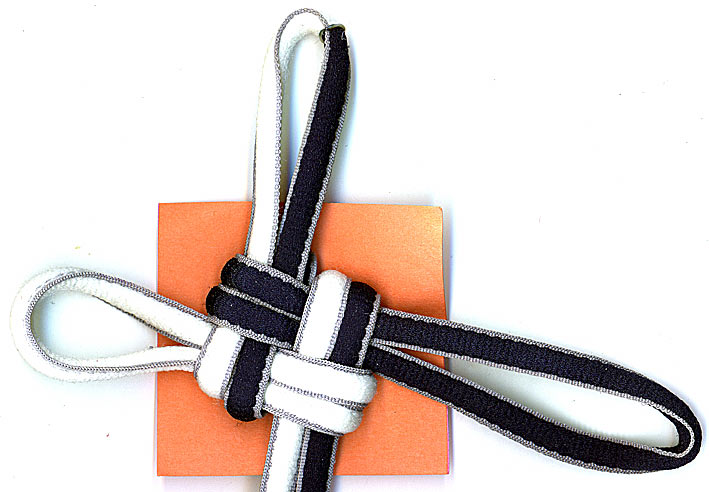 step 8:
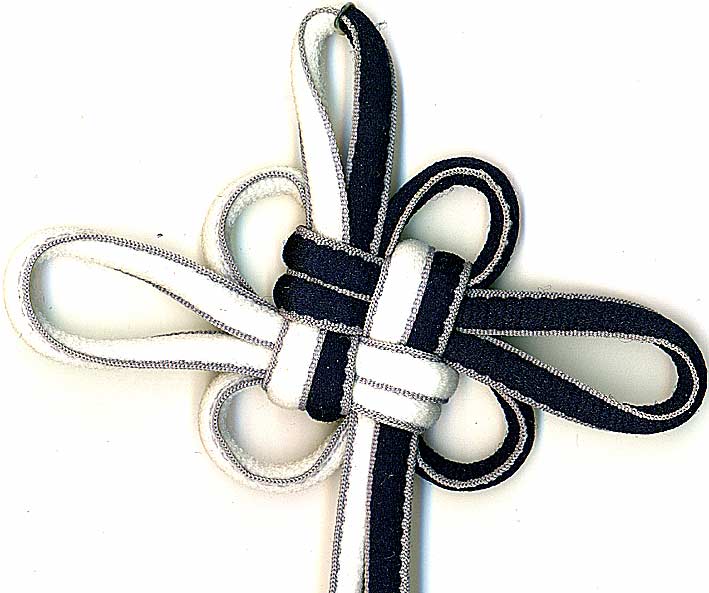 Finished square good luck knot:
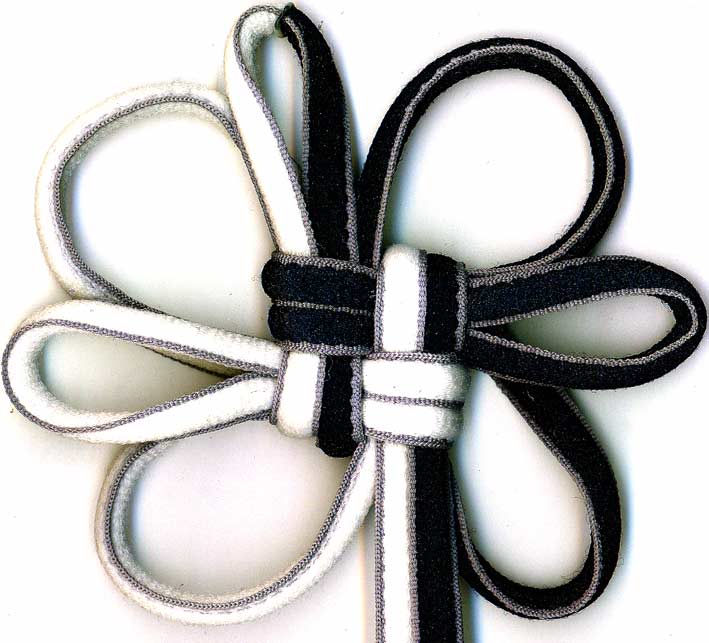 alternate tightening:
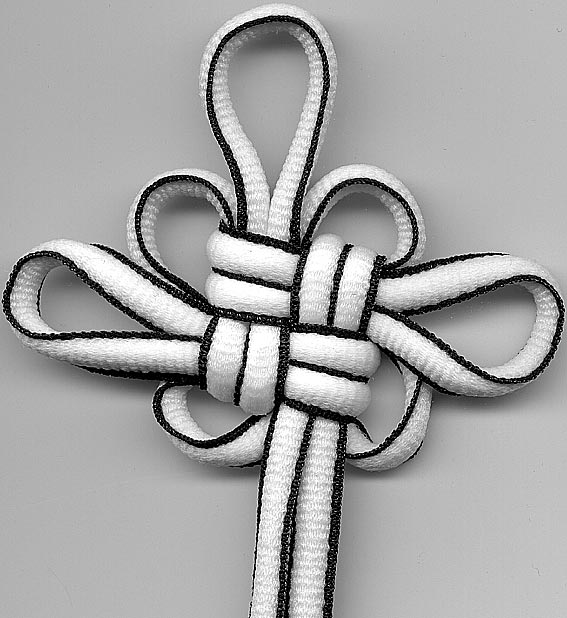
 For a side by side comparison, the leftmost knot is the
standard good luck knot with the crowning directions reversed
between layers. The near left knot is the good luck
with the top layer crowned in the same direction as the bottom
layer, the chrysanthemum knot. A note about the name: long and
long ago I had a discussion with a fellow knotter how in the
Japanese books he was studying, the crowning direction was the
same with both layers whereas in the Chinese books, the crowning
direction reversed between layers. Since the Japanese (and
Korean) name translates as chrysanthemum and since the
mild change (a) makes for a less crisp knot and (b) the knot hangs
slightly differently, naming this slight variation the
chrysanthemum knot seemed like a good idea at the time. Now that
I know the Koreans tie their analogue knot same way as the Chinese
do, but call their mystic/pan chang knot
the chrysanthemum knot... I suppose one could call it the
Japanese chrysanthemum... or the clock counter double
crown...?? First I need to survey all my Japanese knotting books
and see if they all agree on directions and go from there.
For a side by side comparison, the leftmost knot is the
standard good luck knot with the crowning directions reversed
between layers. The near left knot is the good luck
with the top layer crowned in the same direction as the bottom
layer, the chrysanthemum knot. A note about the name: long and
long ago I had a discussion with a fellow knotter how in the
Japanese books he was studying, the crowning direction was the
same with both layers whereas in the Chinese books, the crowning
direction reversed between layers. Since the Japanese (and
Korean) name translates as chrysanthemum and since the
mild change (a) makes for a less crisp knot and (b) the knot hangs
slightly differently, naming this slight variation the
chrysanthemum knot seemed like a good idea at the time. Now that
I know the Koreans tie their analogue knot same way as the Chinese
do, but call their mystic/pan chang knot
the chrysanthemum knot... I suppose one could call it the
Japanese chrysanthemum... or the clock counter double
crown...?? First I need to survey all my Japanese knotting books
and see if they all agree on directions and go from there.
Creation Date: Tue Mar 9 16:28:26 PST 2010
Last Modified: Wednesday, 10-Mar-2010 08:47:32 UTC