Chinese Knotting: The Chinese Button Knot Method 2
[ The Chinese Button Knot ]
[ Home ][
Books ][
Links ][
Supplies][
Glossary ][
Blog ][
About ]
Warning! The big versions of the images below are
really big while I conduct an experiment
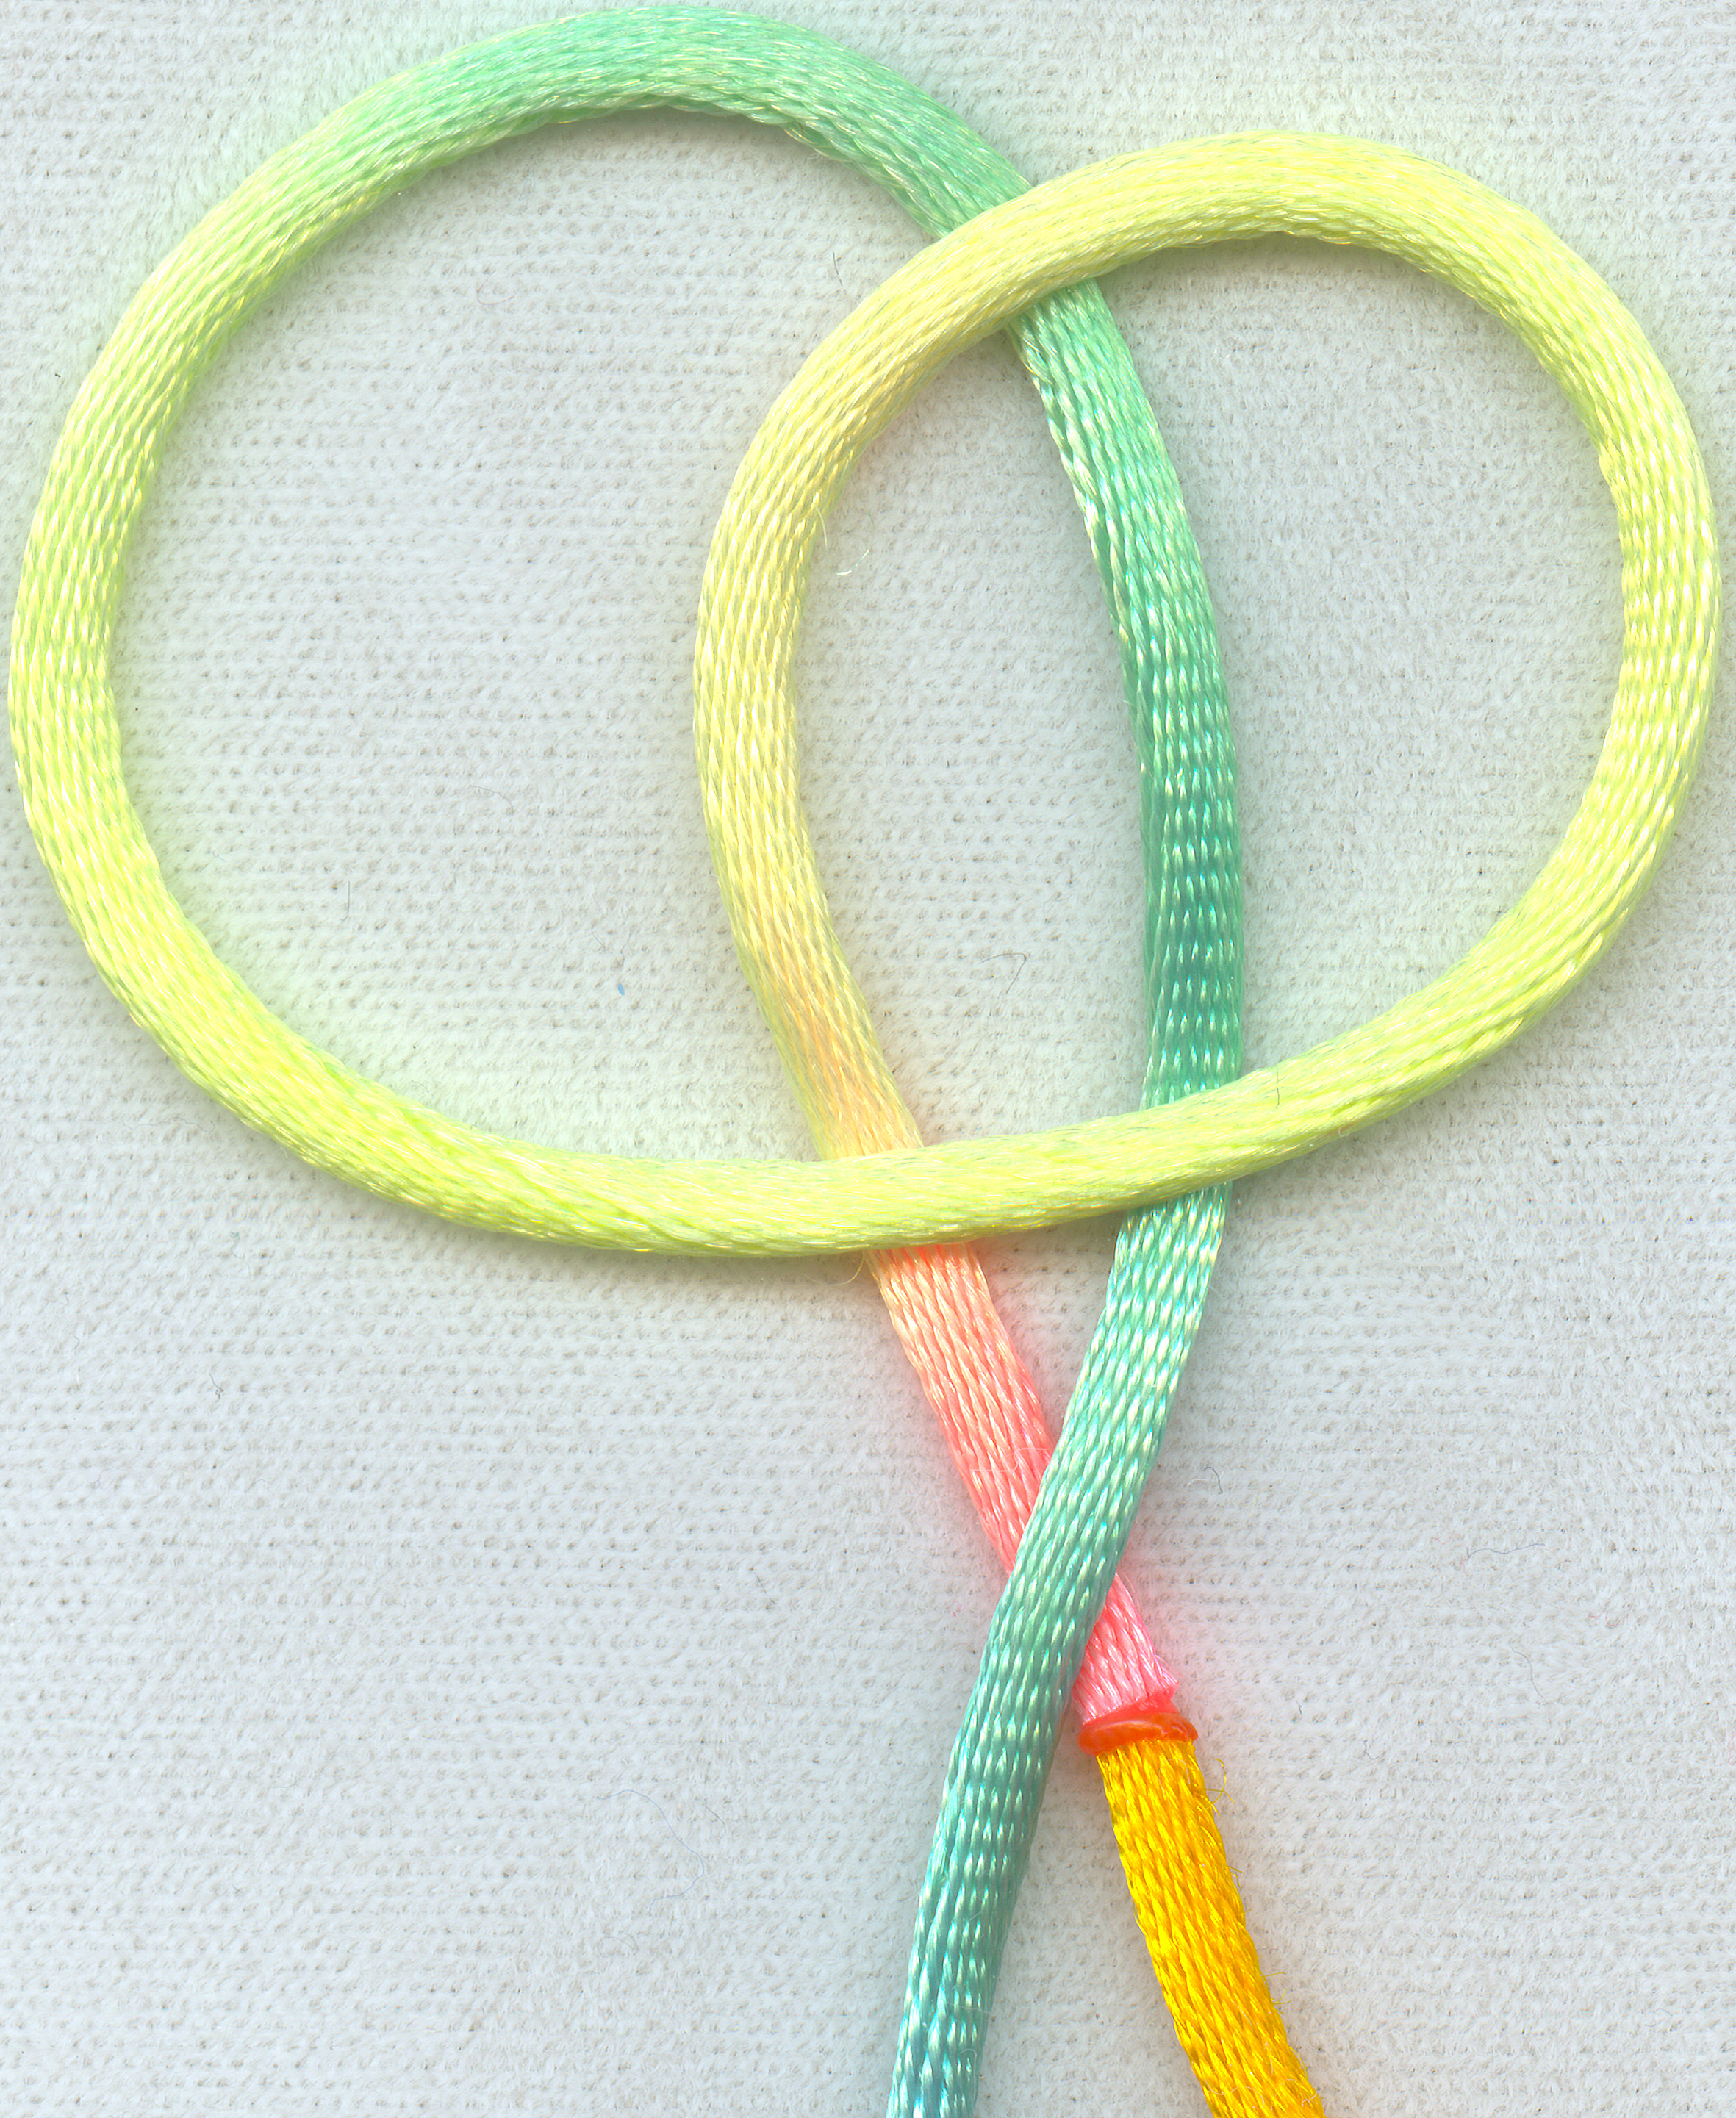
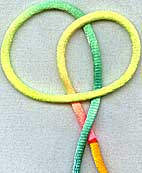 step 1:
keeping in mind that in this image the green side leads to what
is expected to be the fixed end, form this shape
since you are working with one fixed end, it is unlikely that
there is a predetermined mid-point, but if there is, note the join
that indicates the mid-point of the knot.
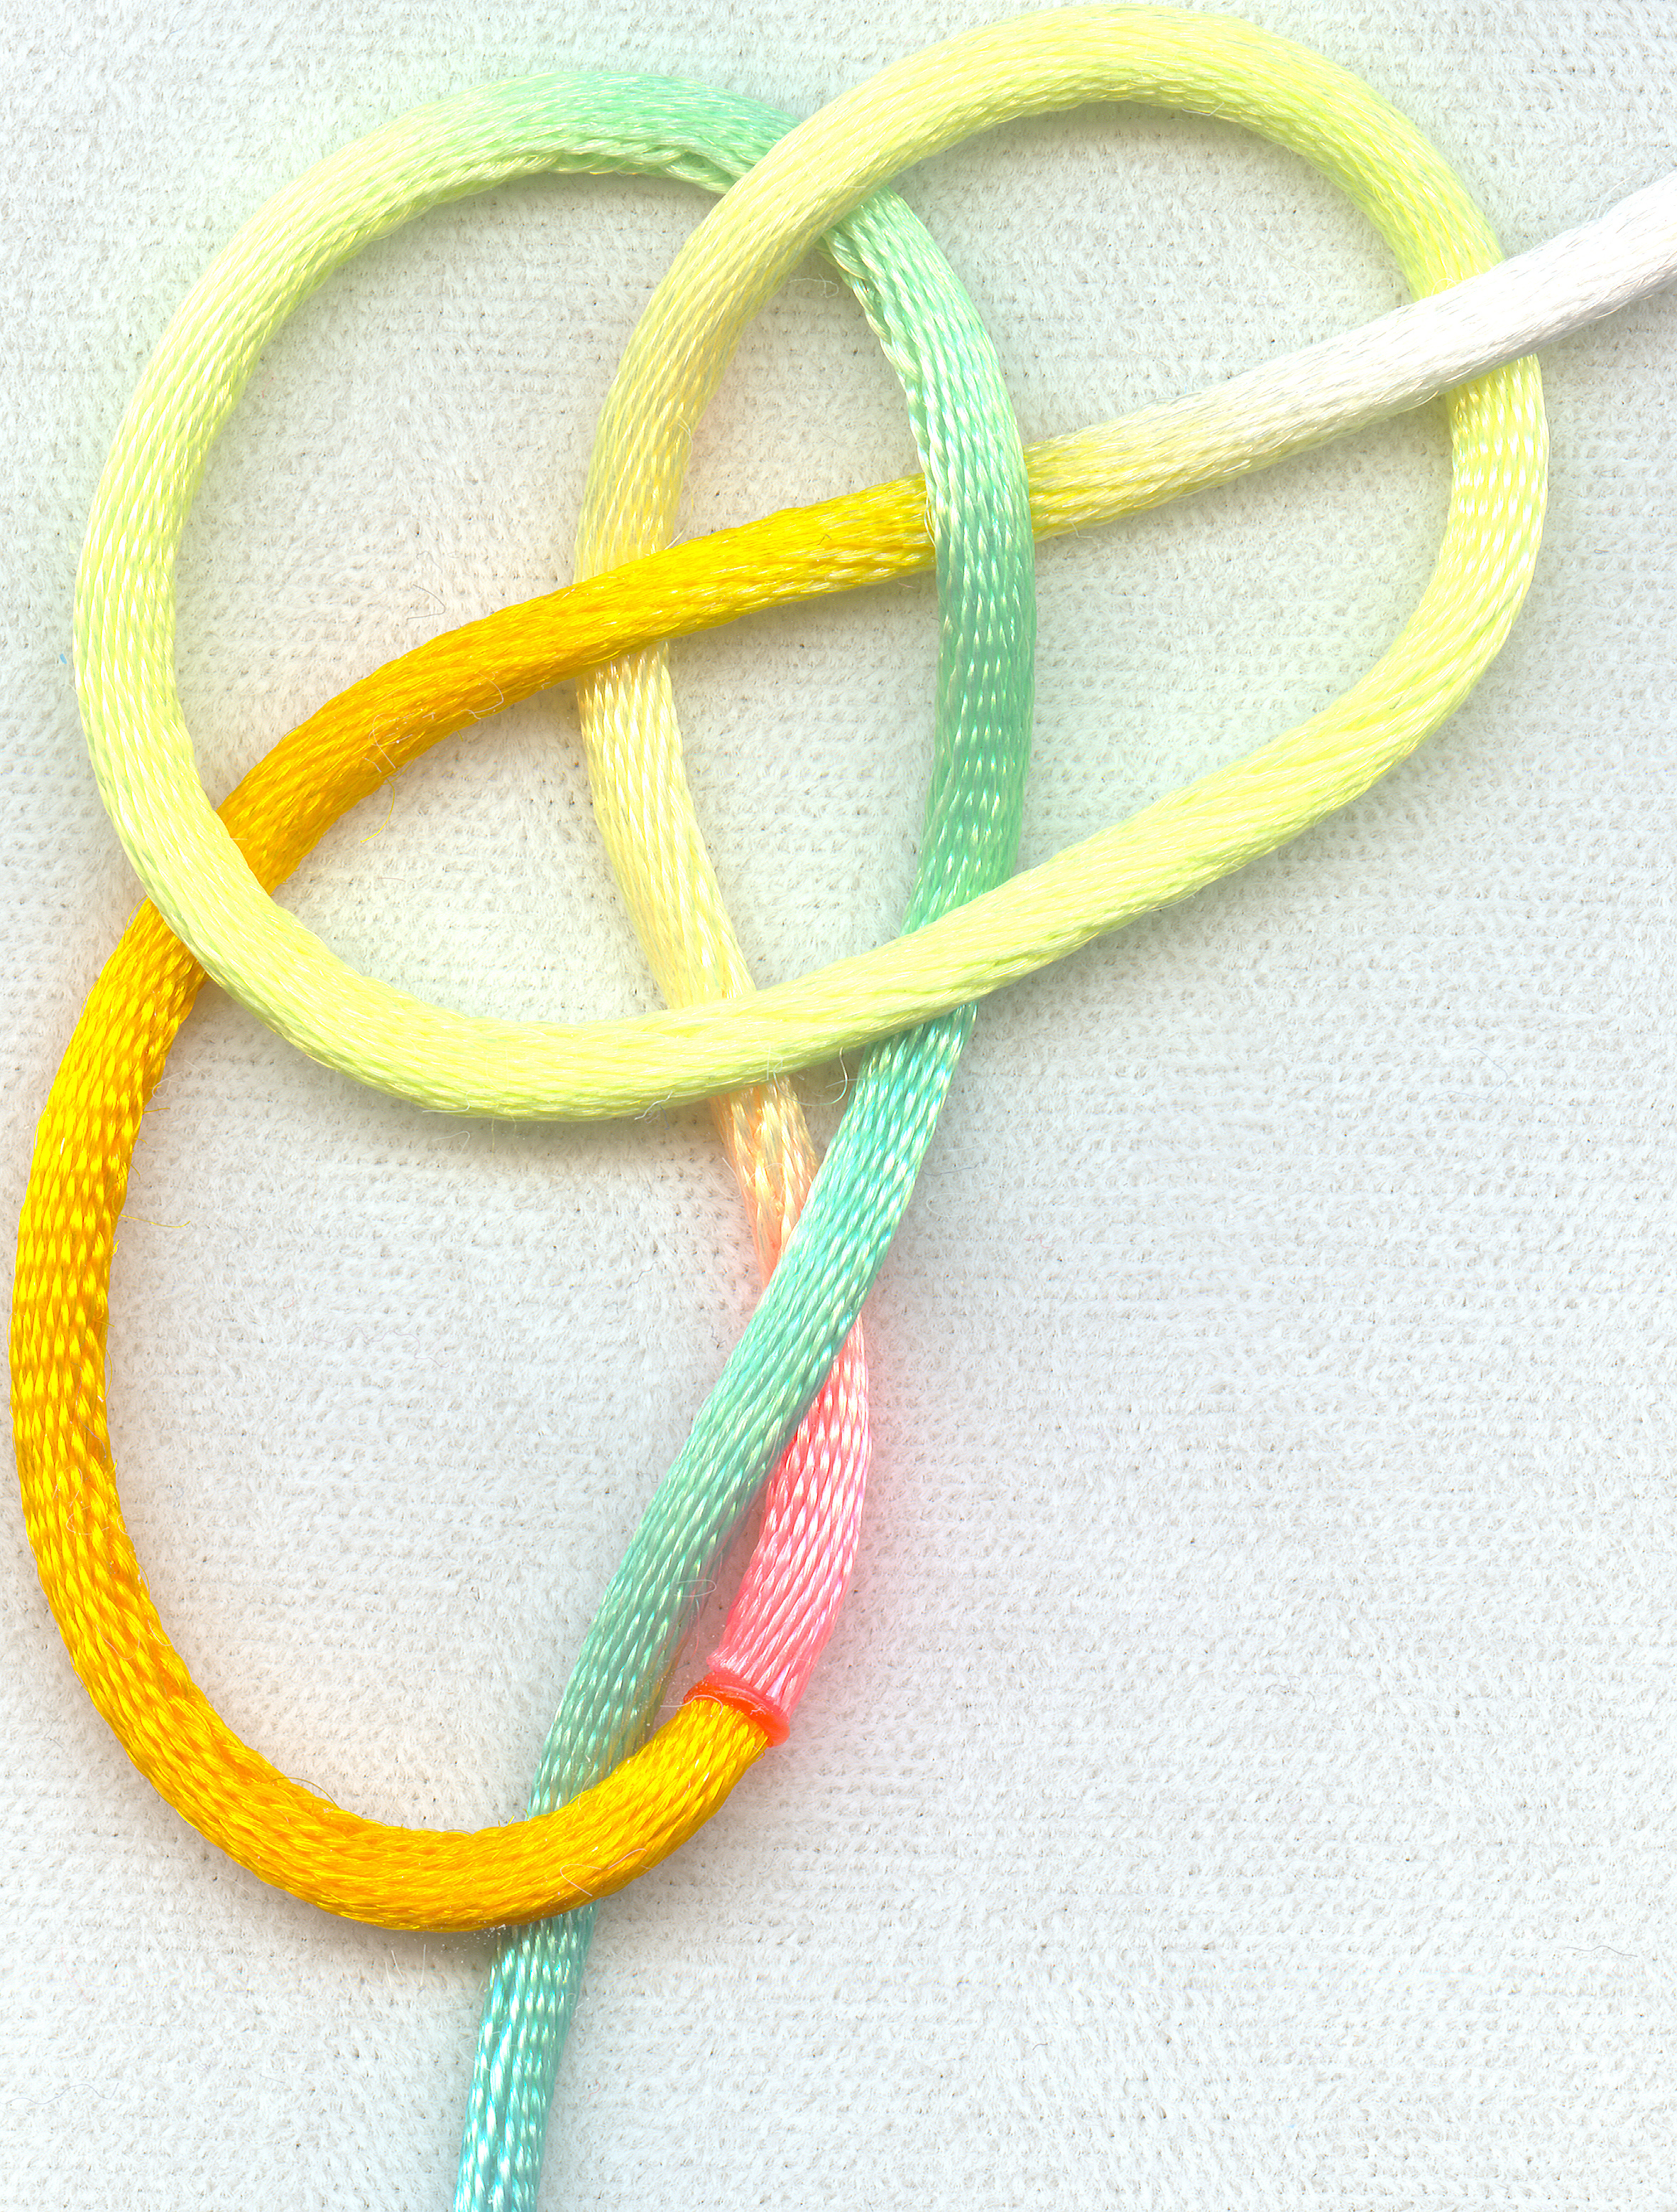
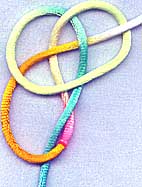 step 2:
fold the working cord over the fixed cord and then weave the
working end across the structure so far.
 step 3:
in this, the last interlacing step, loop the working end around
again
up through the loop formed by the last step
then down through the diamond in the centre.
 step 4:
adjust the cords so that the mid-point is under the diamond in the
middle.
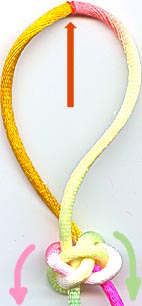 step 5:
push that section of cord up and smooth the edges of the knot down
continue to pull the centre loop up and the bottom ends down.
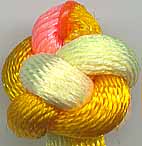 Finished
Chinese Button Knot with Small Loop
Finished
Chinese Button Knot with Small Loop
there is often a danger of the small loop at the top of the knot
getting sucked into the body of the knot and lost
if that happens, just use tweezers or a knitting needle (crochet
hook, etc) to fish the loop back out.
CLW
Creation Date: Sat Apr 27 01:20:00 PDT 2002
Last Modified: Tuesday, 07-May-2002 08:21:03 UTC
Page accessed at local time: Monday, 14-Jul-2025 20:59:31 UTC
 step 2:
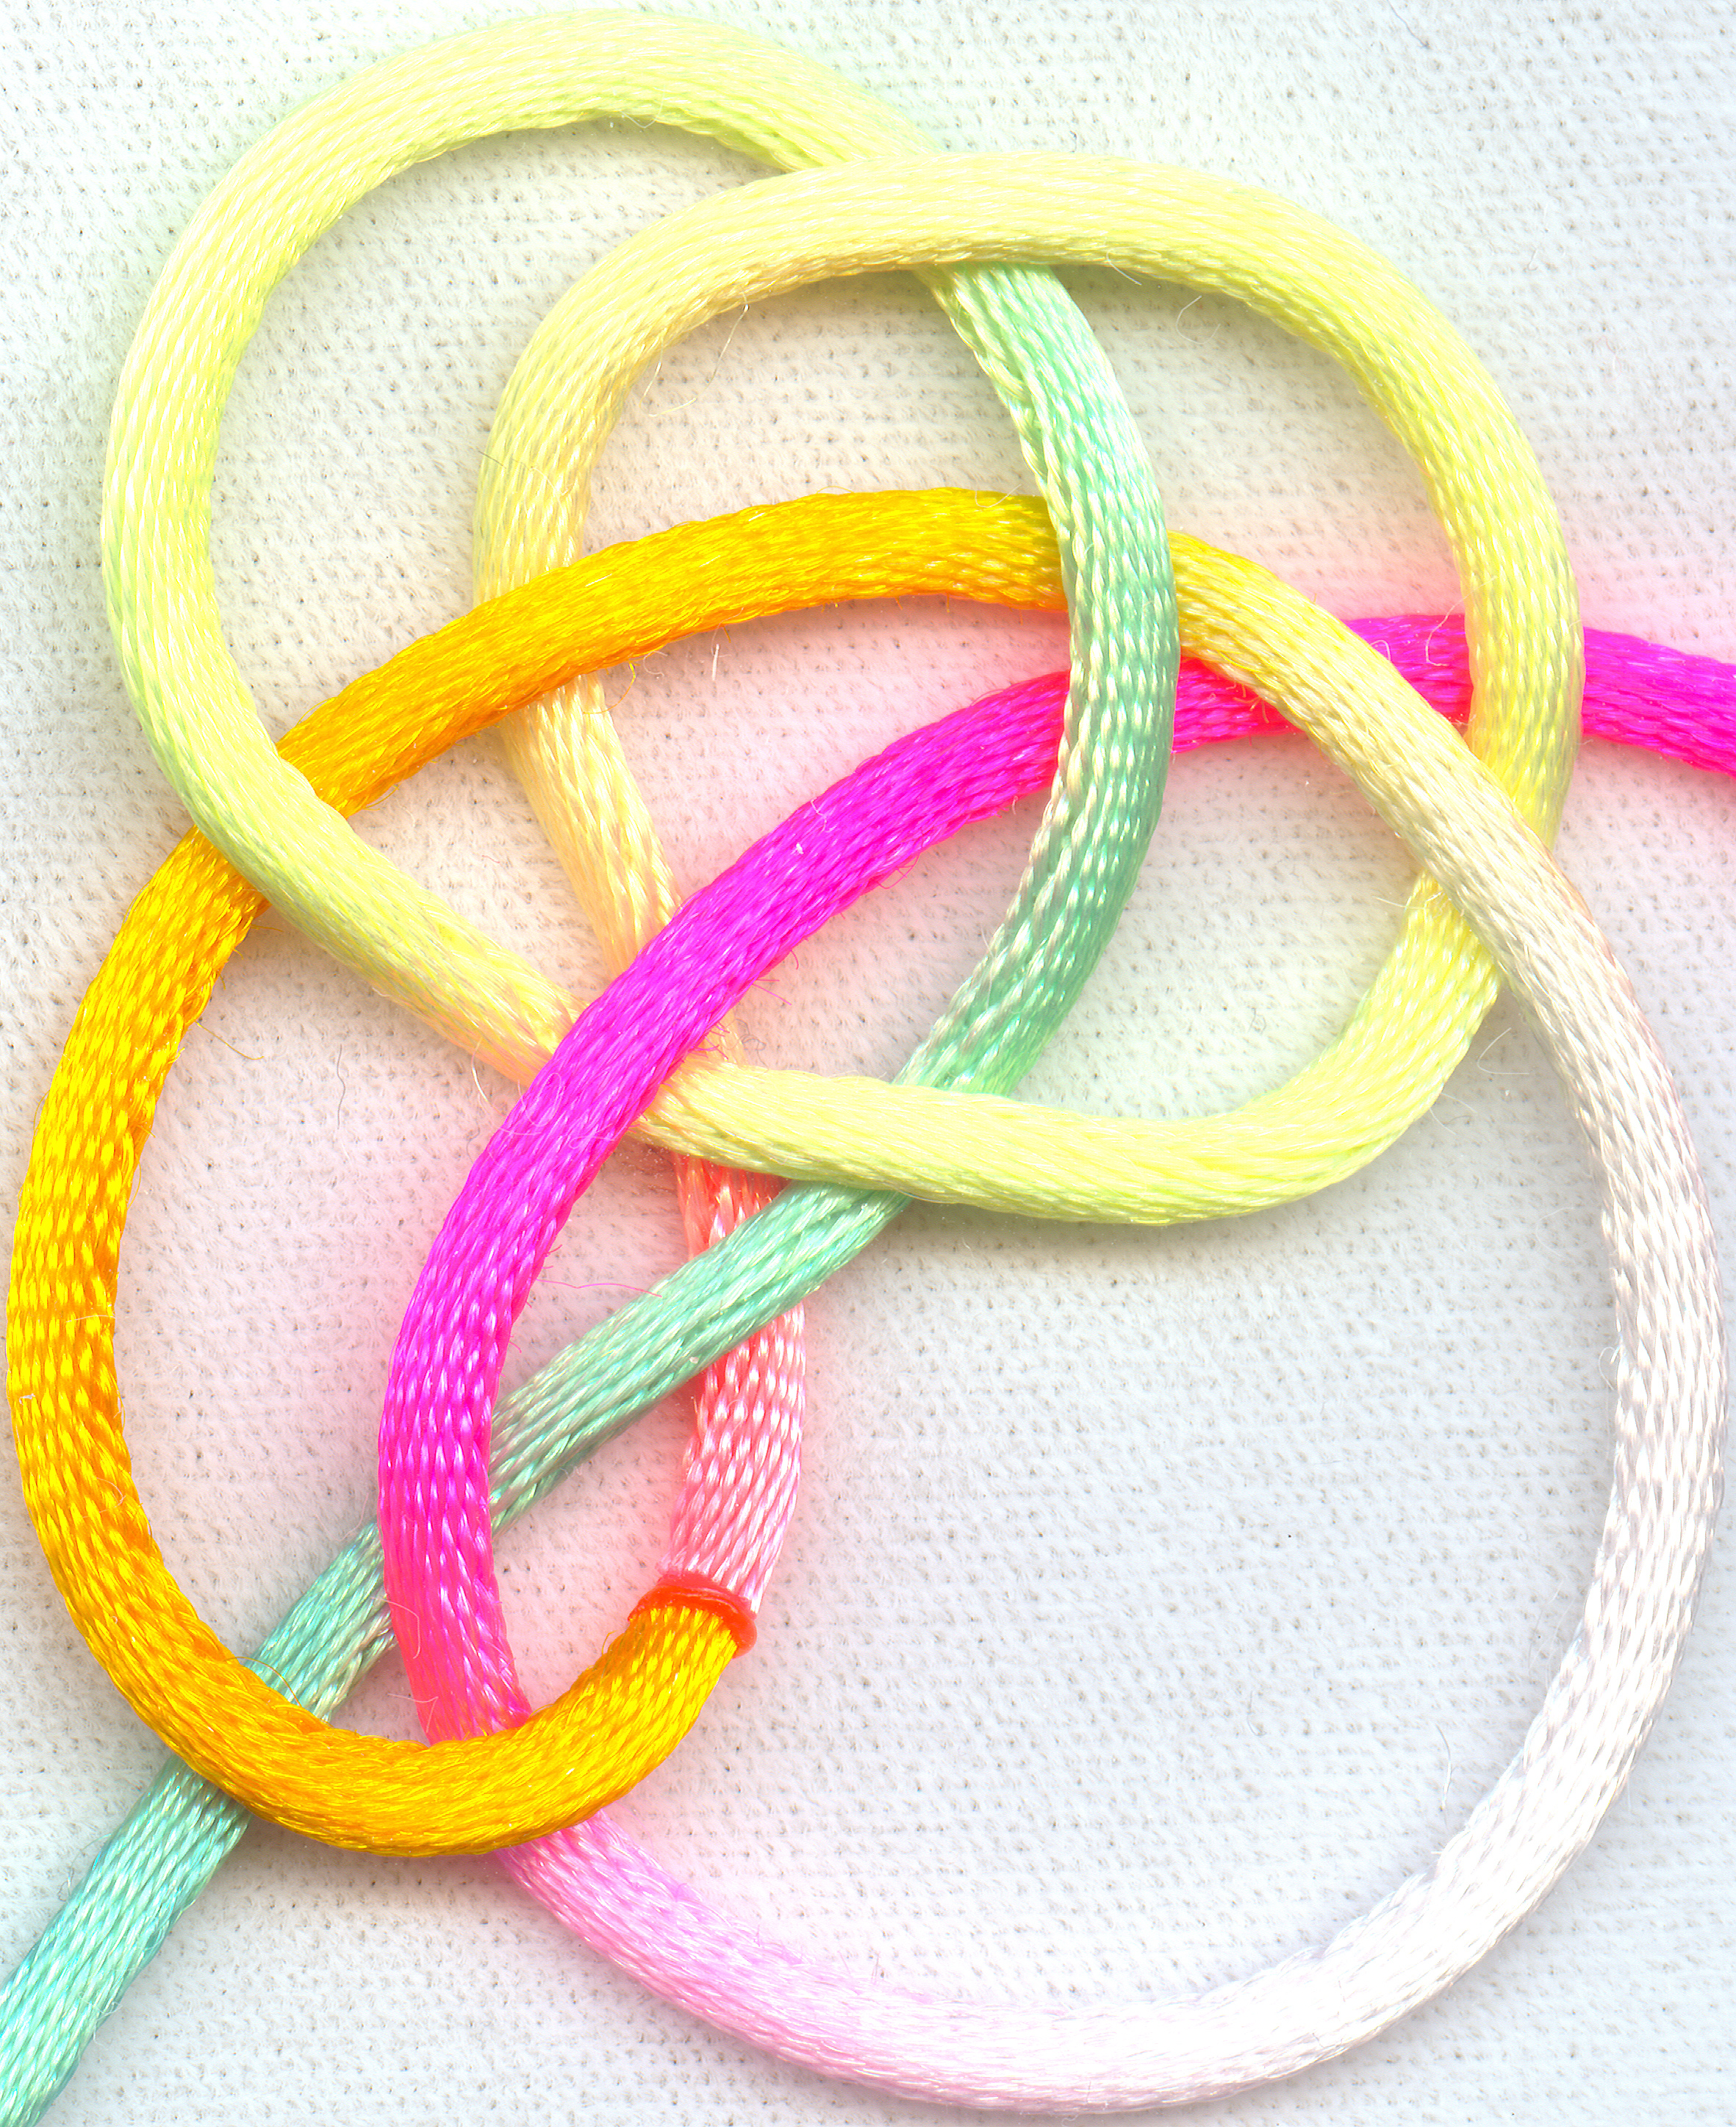 step 3:
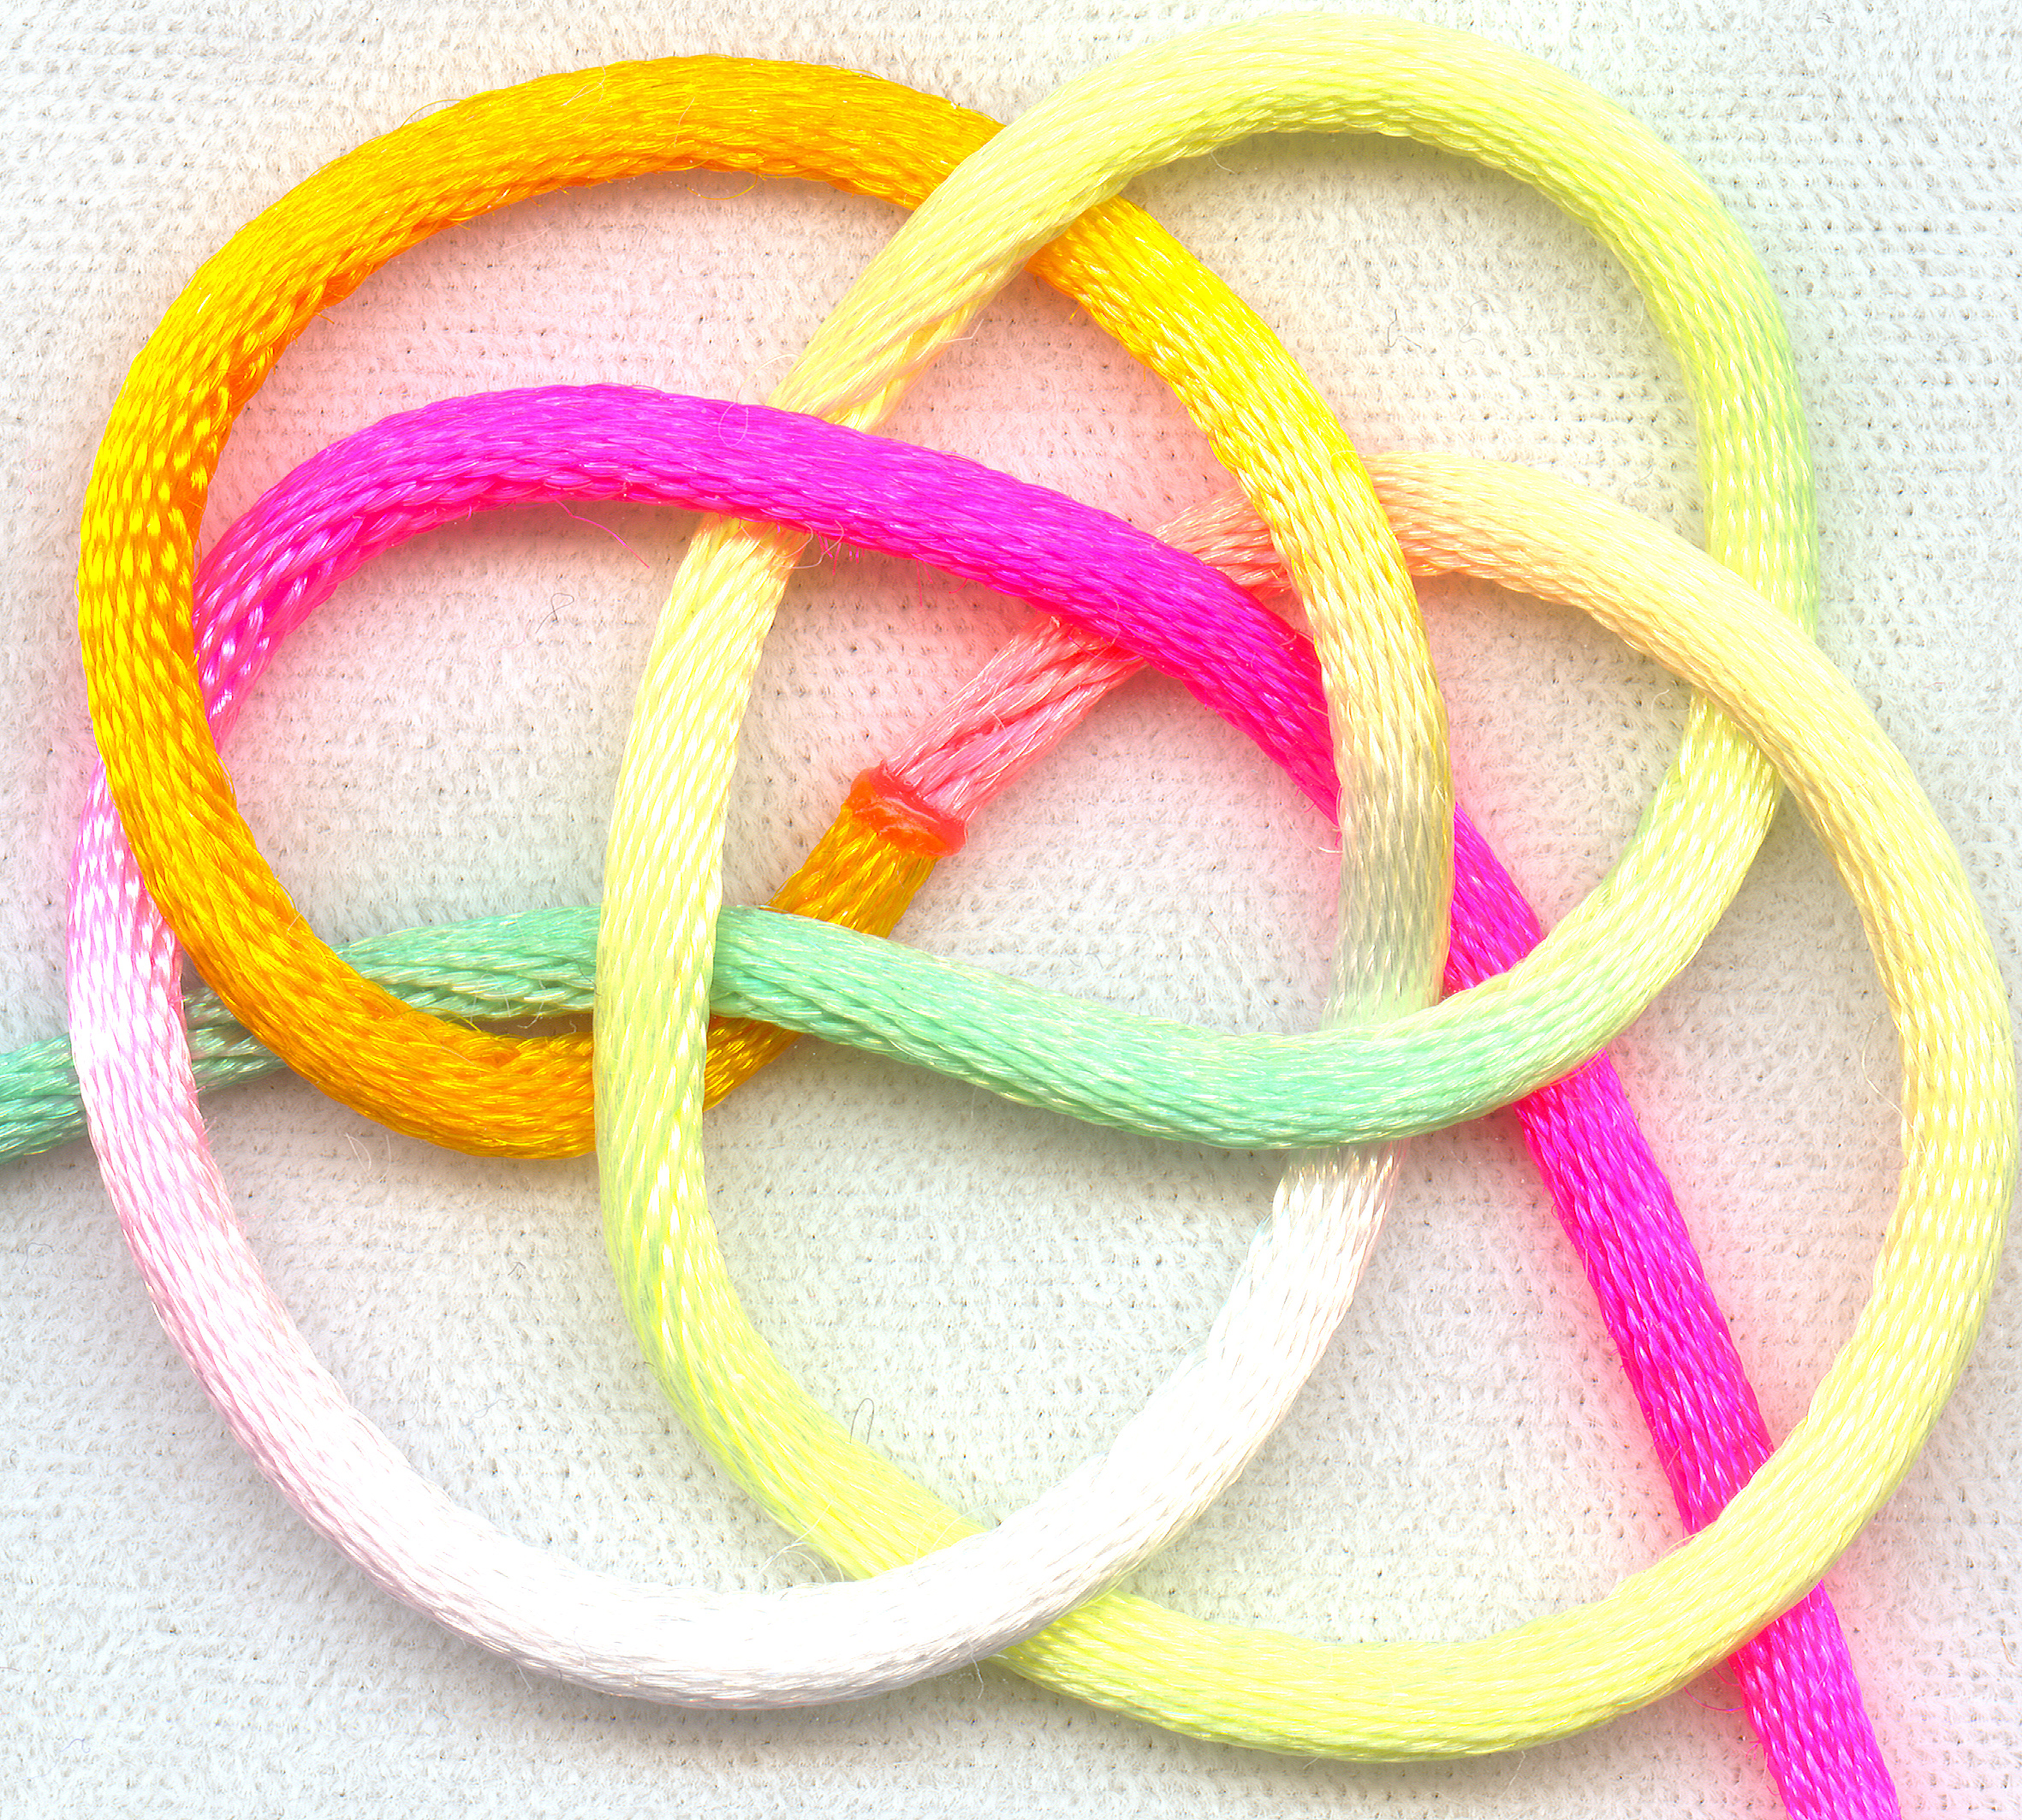 step 4:
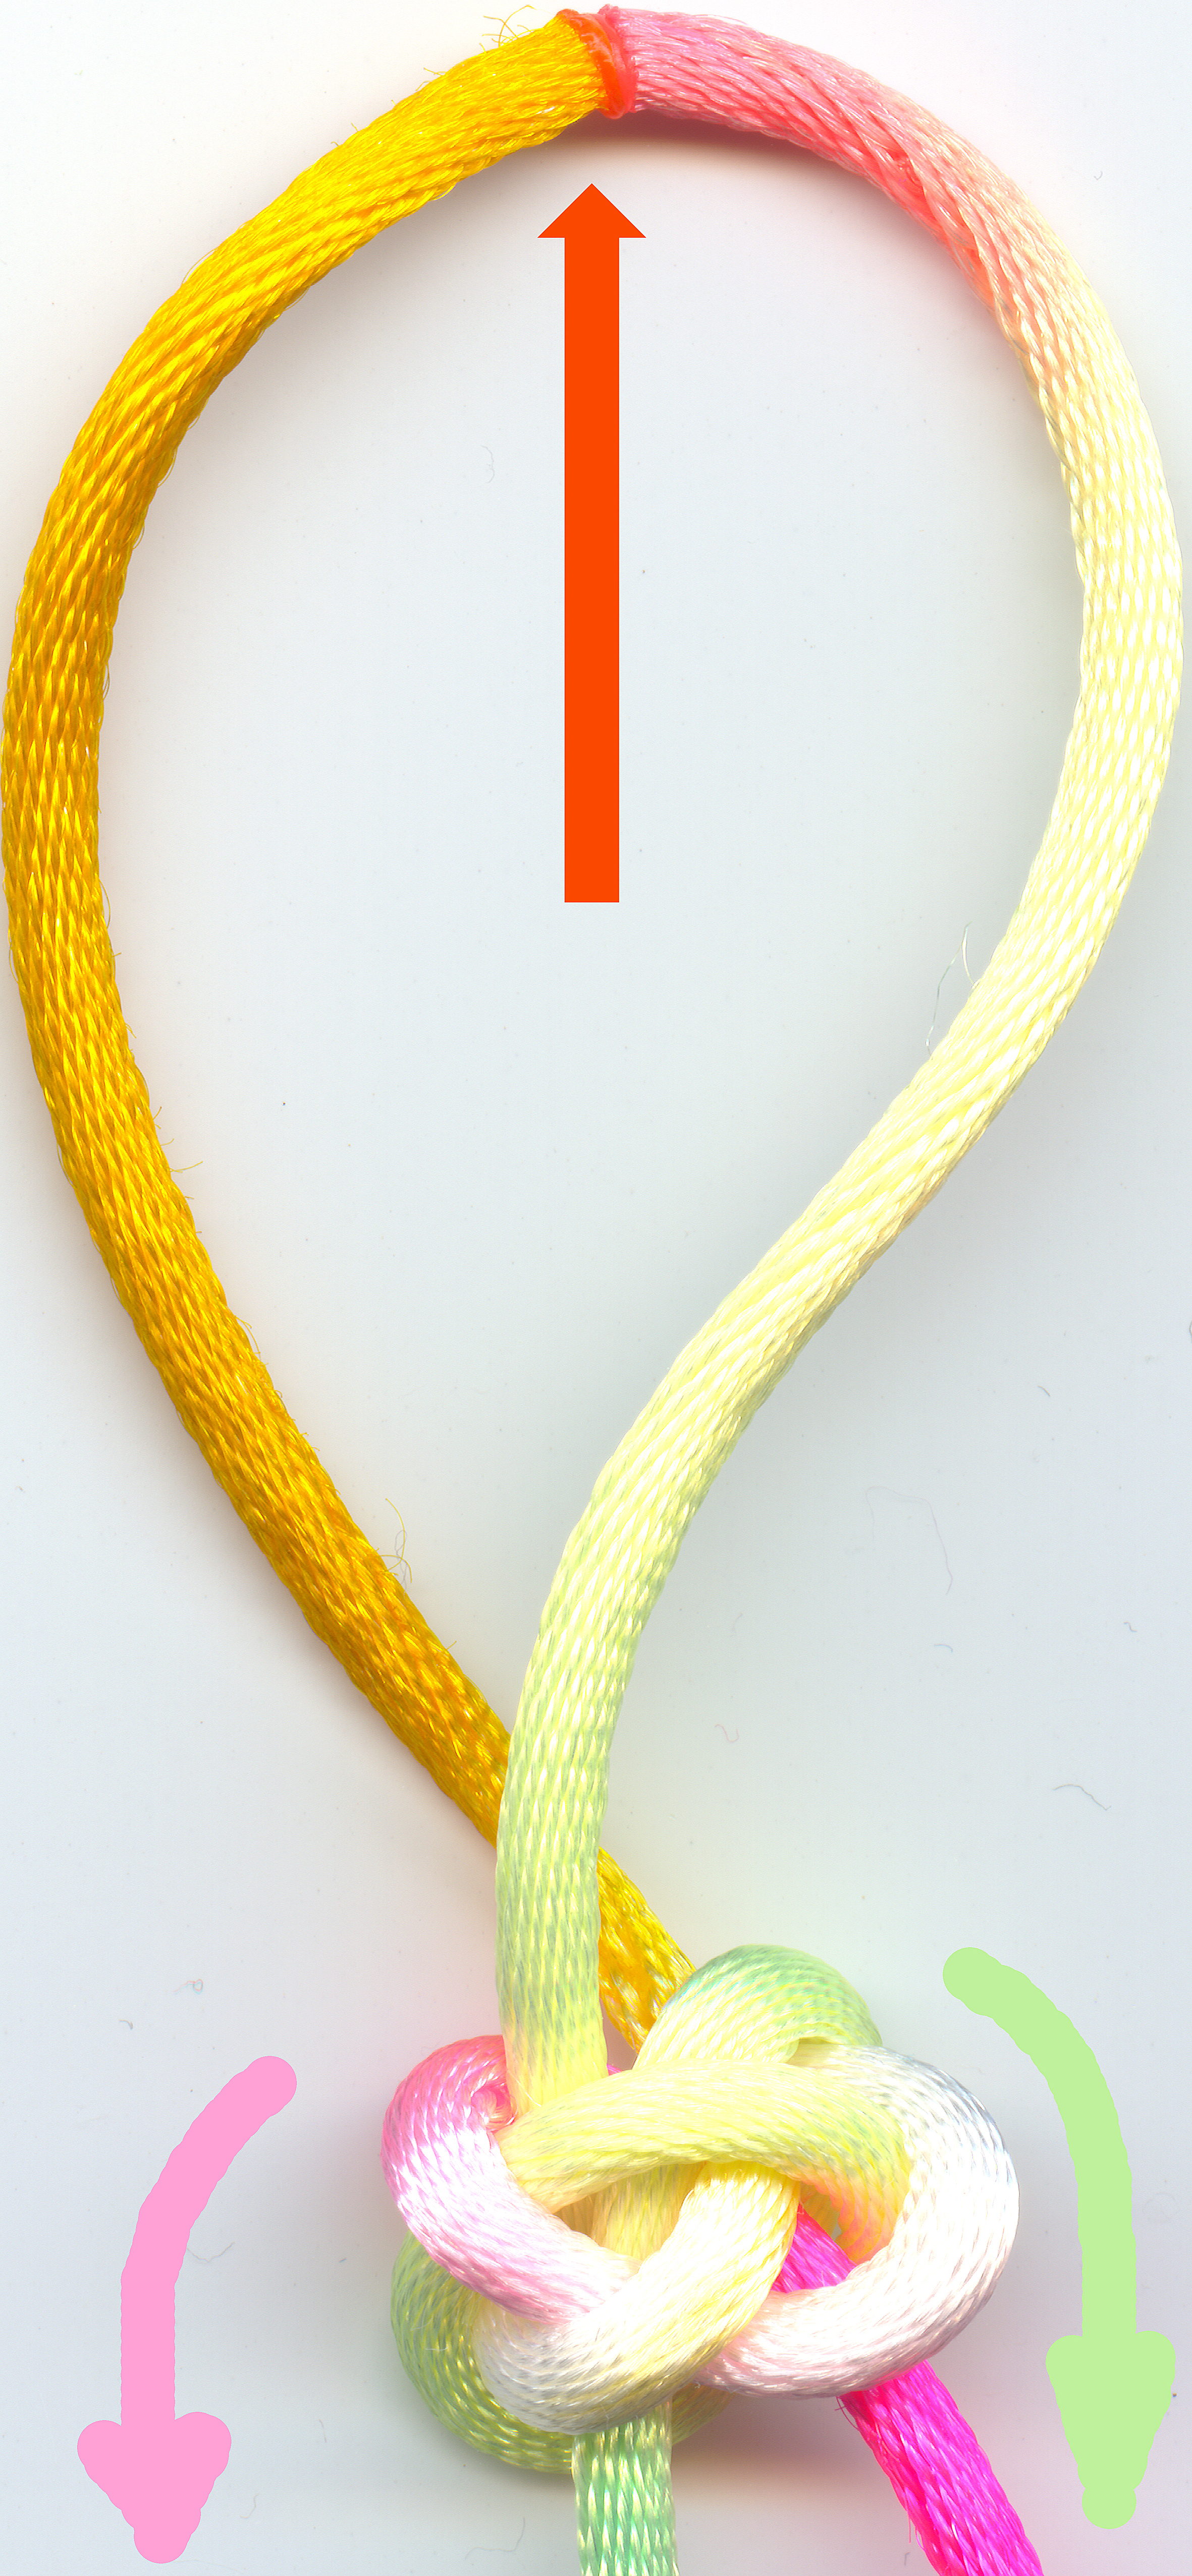 step 5:
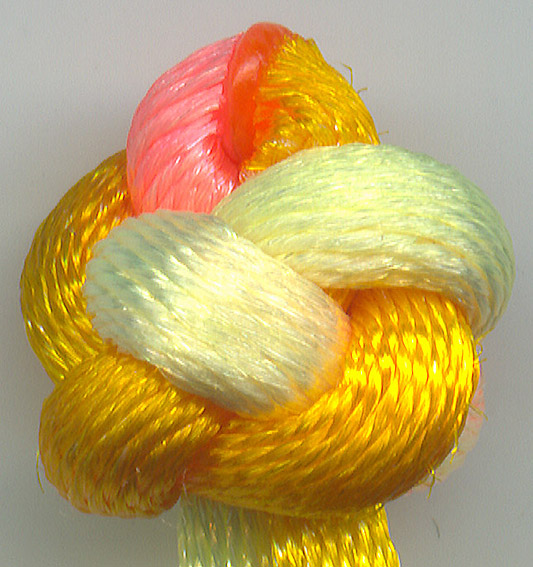 Finished
Chinese Button Knot with Small Loop
Finished
Chinese Button Knot with Small Loop