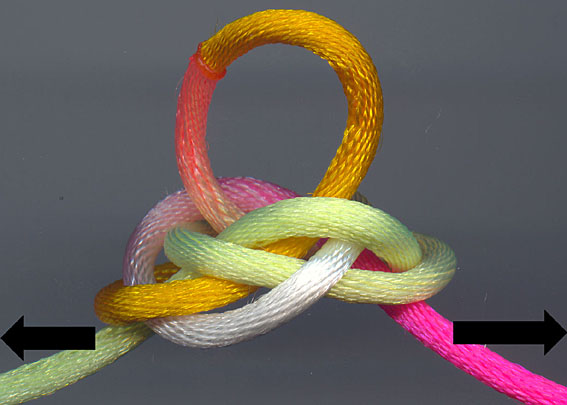
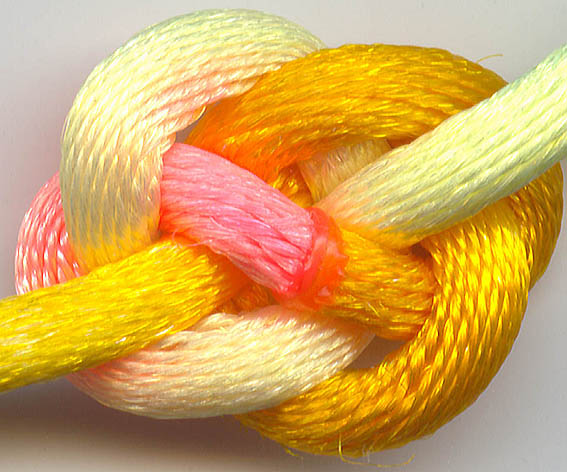
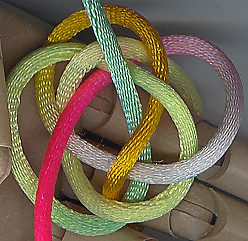
The Chinese Button Knot - Spiral Method
紐扣結, 纽扣结, 玉結び, 연봉매듭
If you only want to learn one method to tie the Chinese Button Knot, then learn this one because it extends/extrapolates the most logically to other forms of Button Knots.
Tying
-
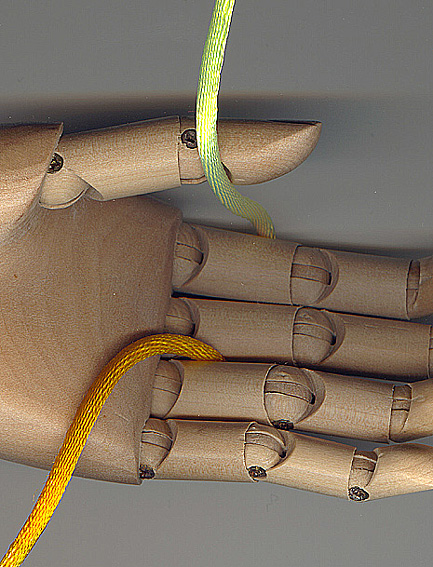
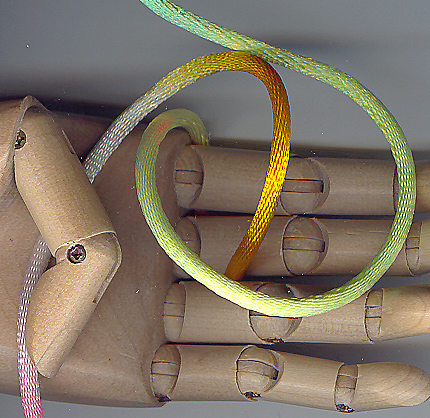
step 1
lace the cord through your fingers with your palm facing
up, the midpoint of the knot wil be under your fingers at the back
of your hand.
-
-
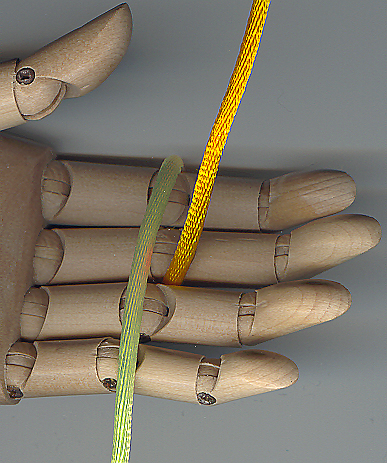
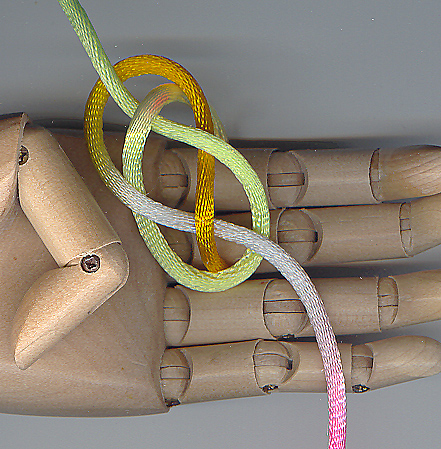
step 2
fold each end of the cord over your fingers,
the direction is unimportant as long as you are consistent,
in this case, the chosen direction is counter-clockwise.
-
-
step 3
loop each end in a semi-circular fashion.
-
-
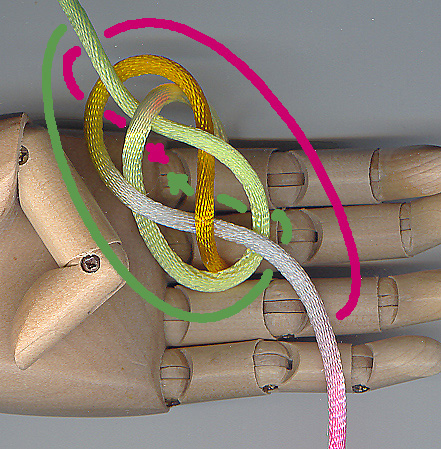
step 4
lace each end under its respective standing part where
they curve over your fingers at this point you have a Carrick
Bend.
-
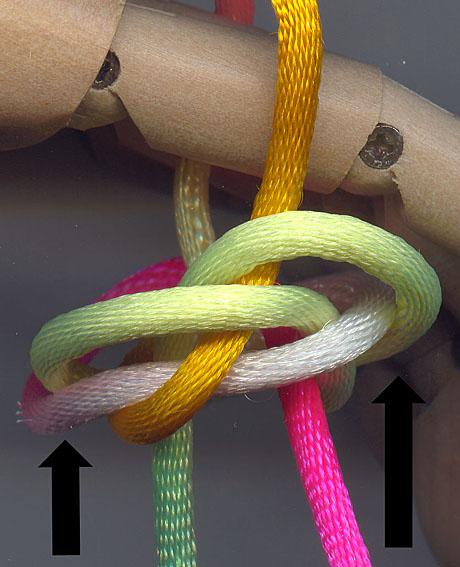
- step 5 each end should again travel in a semi-circle, then be tucked under the knot through to the diamond in the centre, the other landmark to keep in mind is that the working ends must pass the loop that is around your fingers before being tucked under the rest of the knot.
-
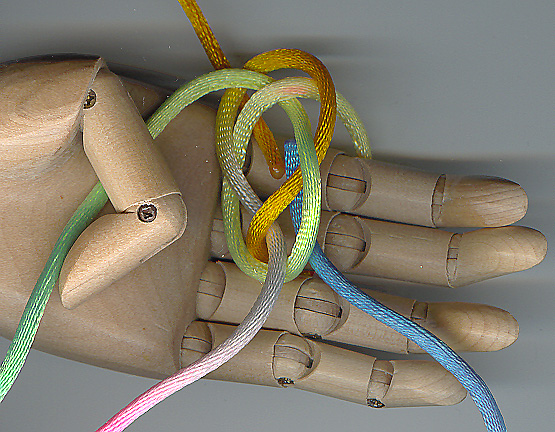
step 6
once you have pulled the ends through the diamond which
is the bottom of the knot you are done with the first stage of
tying, you now have a disk of material resting on your hand, pull
on the ends and the loop around your fingers while pushing the
edges of the disk towards your hand.
-
- step 7 at this point, it is safe to simply pull firmly on the middle loop and the ends, most of your first stage of tightening will be accomplished by this action.
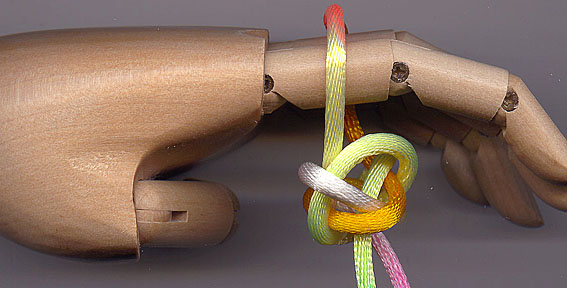
Tightening
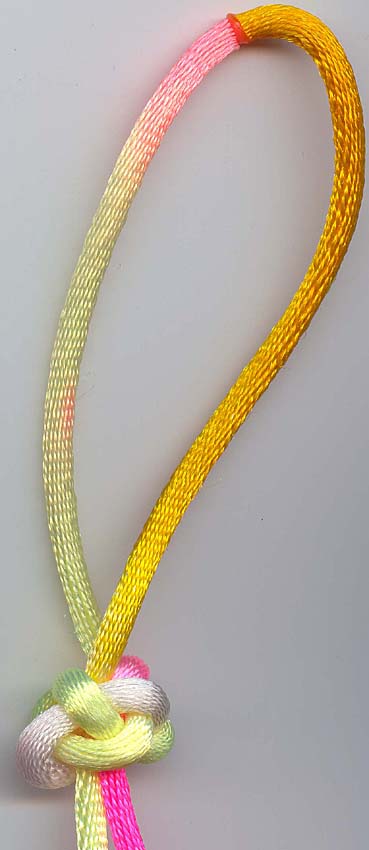
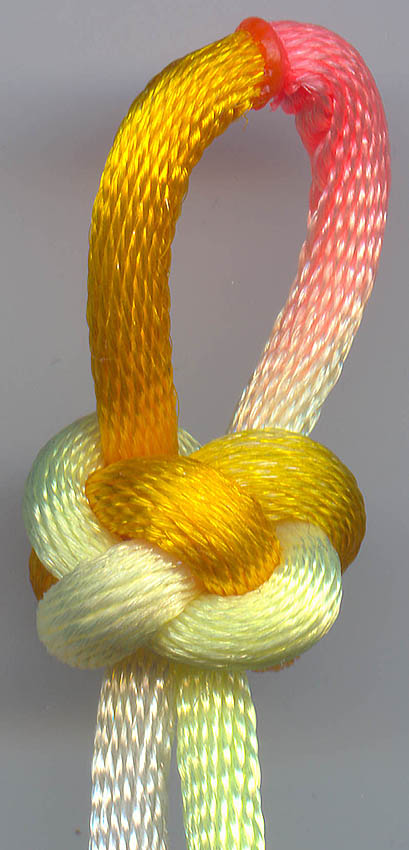
- Big Loop with a big loop, this finished version of the knot is functionally equivalent to the knot as it would be in sequence with other knots
-
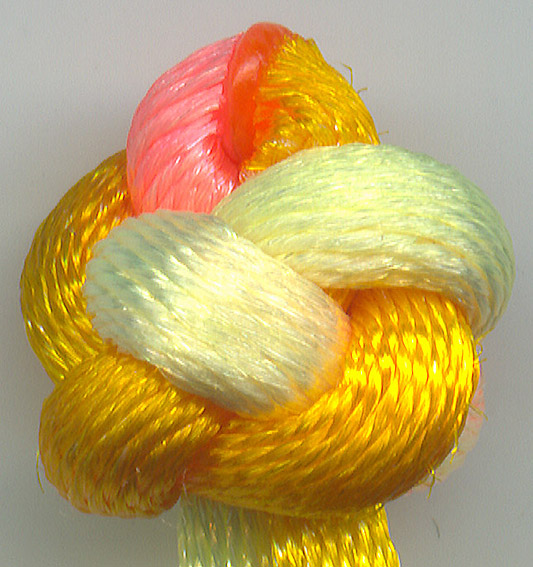
Small Loop
there is often a danger of the minimal loop or nub at the
top of the knot getting sucked into the body of the knot and lost,
if that happens, just use tweezers or a knitting needle (crochet
hook, etc) to fish the loop back out.
-
-
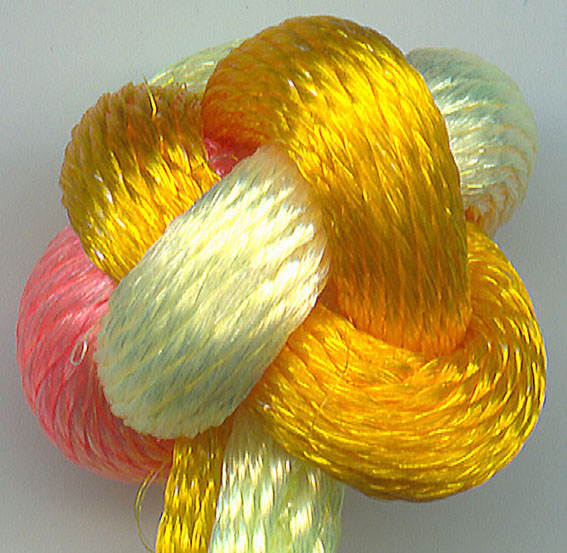
No Loop
or you may want there to be no loop at the top, it's your
choice.
-
- Flat Back at step 7 before much tightening had occured, if you then pulled both ends out, a flat version of the Chinese Button Knot is formed